
Mirror Installation Over Tile: A Naples Prep Checklist
Tile changes the planning for a wall mirror. A safe mirror installation over tile starts with accurate measurements, a clear view of the finished wall, and a mounting plan that accounts for the mirror's size and the surface behind it.
In Naples homes, a mirror may need to line up with a vanity, backsplash, lights, outlets, and decorative tile details. Taking time to map those features before fabrication helps prevent fit problems and protects the finished wall. Use this checklist before your mirror is ordered or installed.
Key Takeaways
- Measure the finished tile, countertop, backsplash, and nearby fixtures, not just the rough wall.
- Mark the sink centerline and proposed mirror outline, then test the layout with a full-size template.
- Keep outlets and electrical boxes accessible, and plan any cutouts before the mirror is made.
- Tile, wall construction, and mirror weight all affect the mounting plan.
- Get professional help for large or frameless mirrors, uncertain wall conditions, or work near wiring and plumbing.
Why tile calls for extra planning
A tiled wall can look flat from across the room but have changes in depth, grout lines, accent bands, or uneven spots up close. Those details can affect how a mirror sits and whether its edges appear straight. If the mirror is meant to align with the vanity, the tile pattern can also make a centered installation look off-center.
Treat the finished surface as the reference
Measure from the installed tile, backsplash, countertop, and trim whenever possible. If the bathroom is still being remodeled, coordinate with the contractor so final dimensions account for the tile and other finishes. A change in backsplash height or sink location can shift where the mirror should sit.
Include the whole room in the plan
Nearby cabinet doors, faucets, towel bars, shower doors, and light fixtures can limit the usable space. For a bathroom update that includes a shower enclosure, plan the mirror alongside the other glasswork so the pieces fit the room together. We provide custom mirror services in Naples and throughout Southwest Florida, including custom bathroom and vanity mirrors.
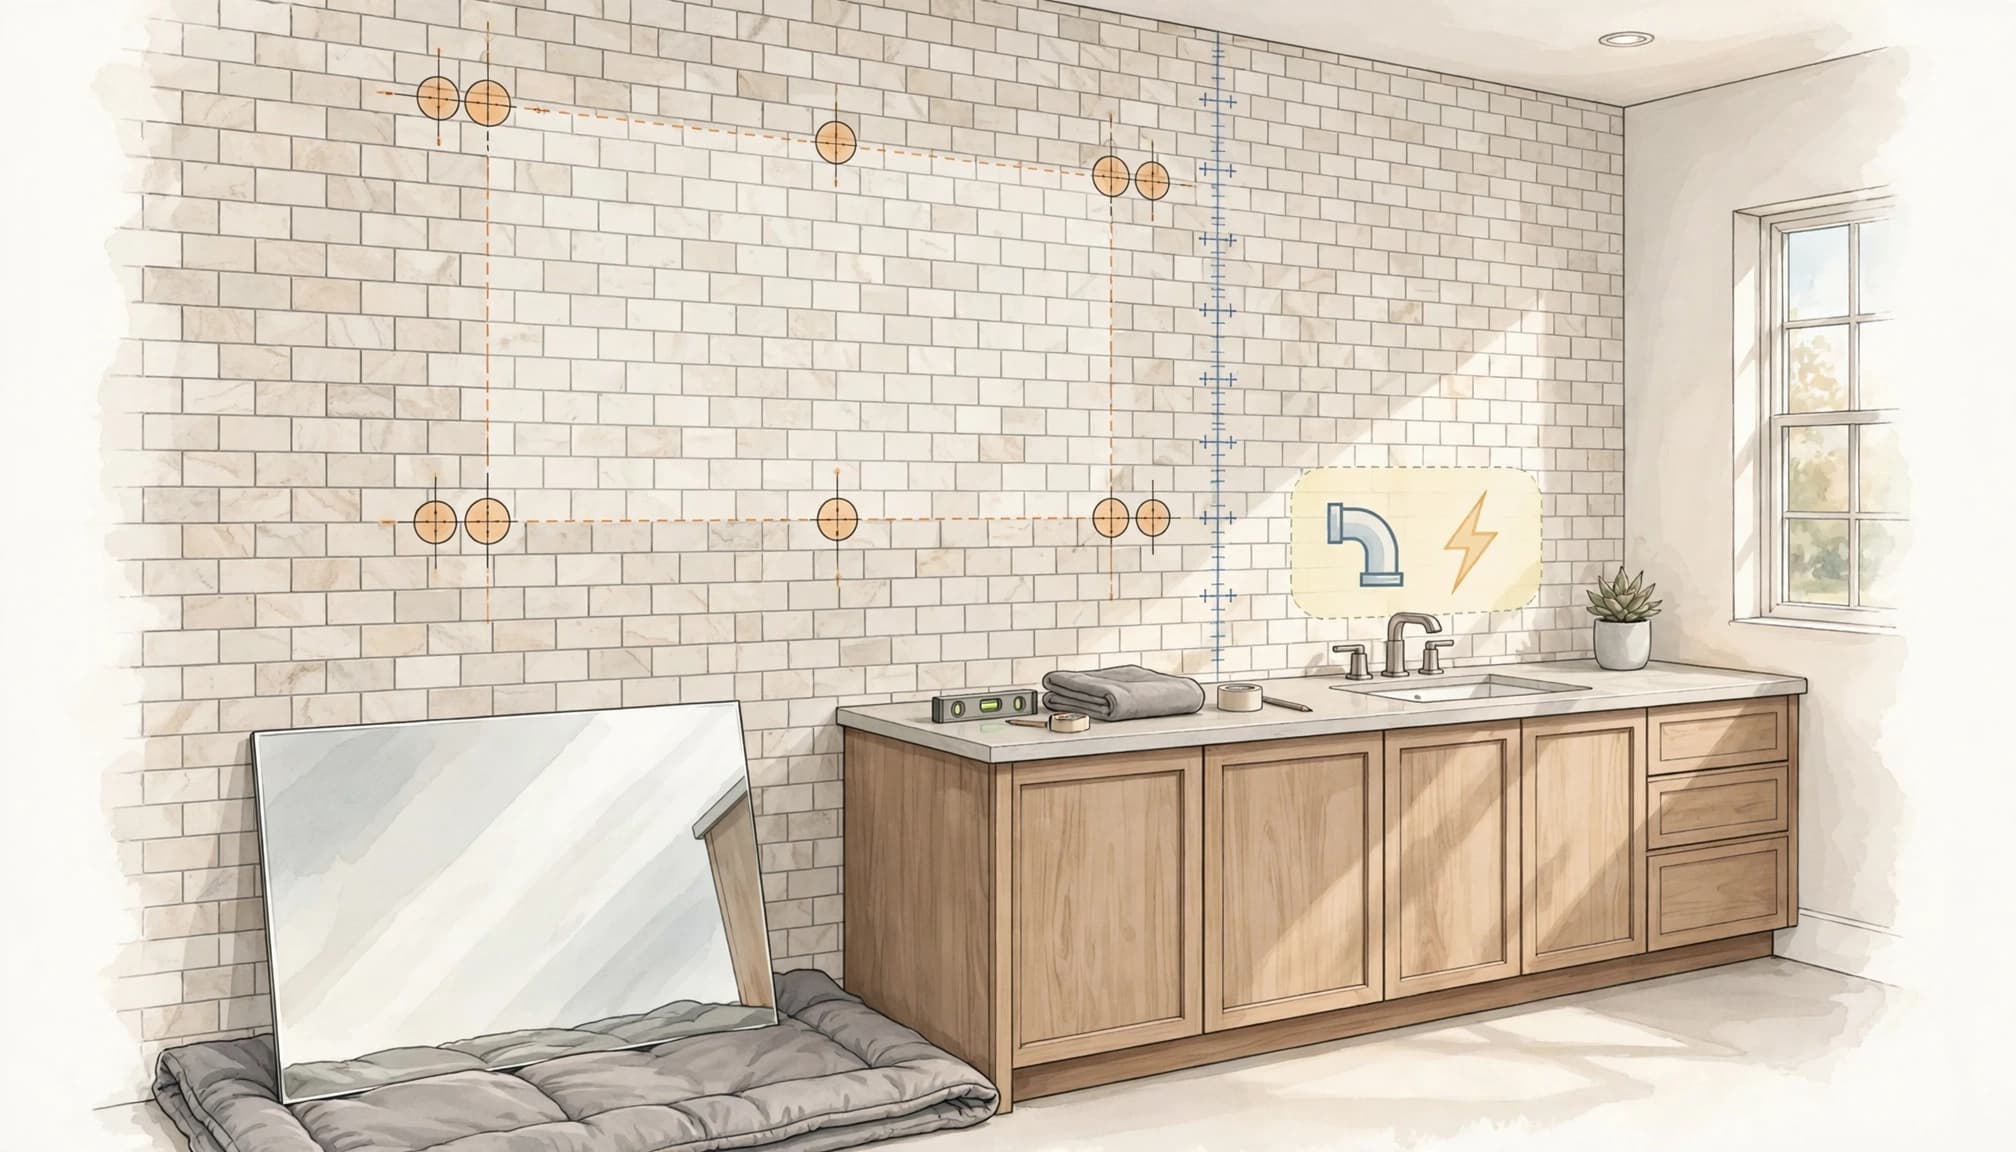
Measure the finished wall before choosing a mirror
A measurement taken from one point may miss a wall that narrows or shifts slightly. Record the available width at several heights, especially on older walls or around decorative tile. Keep the measurements together with a straight-on photo of the vanity wall.
Capture every dimension that affects fit
Write down the vanity and countertop widths, backsplash height, ceiling height, and distance to the side walls. Also note the sink and faucet centerlines, wall lights, outlets, switches, medicine cabinets, and trim. Measure the mirror's outside dimensions , including any frame, rather than recording only the reflective glass area.
For double vanities, decide whether you want one wide mirror or separate mirrors above each sink. Mark each sink centerline first. Then compare the mirror layout with the available wall space and any sconces between or beside the sinks.
Check the details of the mirror edge
For a framed mirror, record the outside frame size. For a frameless mirror, decide which edge finish and corner shape fit the room. If the design needs a notch or opening, include its location and dimensions in the plan before fabrication.
A template can reveal problems a tape measure won't. Cut cardboard or kraft paper to the proposed mirror size, mark the centerline, and hold it against the tile. Check the outline from several points in the room, not only while standing directly in front of the vanity.
Test the height and position before ordering
A mirror should feel comfortable to use and look balanced on the wall. A common starting point is a gap of about 4 to 6 inches above the backsplash , but that spacing may change with the mirror size, faucet, lighting, or household needs. Treat it as a planning reference, not a fixed rule.
Use a full-size outline
Apply painter's tape to show the proposed top, bottom, and side edges. Stand where you normally use the sink and check the reflection. Then step back to see whether the mirror looks balanced with the vanity and tile pattern.
Open cabinet doors and check the full movement of nearby shower doors. Also look at the mirror from the bathroom entrance. A layout that feels centered at the sink may look misaligned with a decorative tile strip or wall edge from across the room.
Check clearance around fixtures
Leave room for light fixtures and their mounting plates. Don't assume the mirror can cover an outlet or sit over a sconce. Keep electrical boxes accessible, and plan cutouts or a different mirror layout where needed. If an outlet needs to move, that work belongs with a qualified electrician before the mirror is fabricated.
Inspect the tile and wall before installation
Tile is the visible finish, but it isn't the only factor in a secure installation. Behind it may be different wall materials or backing, and the condition of that surface matters. A large or heavy mirror needs a mounting plan suited to both its weight and the wall construction.
Look for damage and uneven areas
Before work begins, check for cracked or loose tile, damaged grout, uneven surfaces, and signs of moisture near the vanity. A mirror shouldn't conceal a wall problem that needs attention first. If water has affected the wall, address the source and repair the surface before placing new glass over it.
Identify hidden obstructions
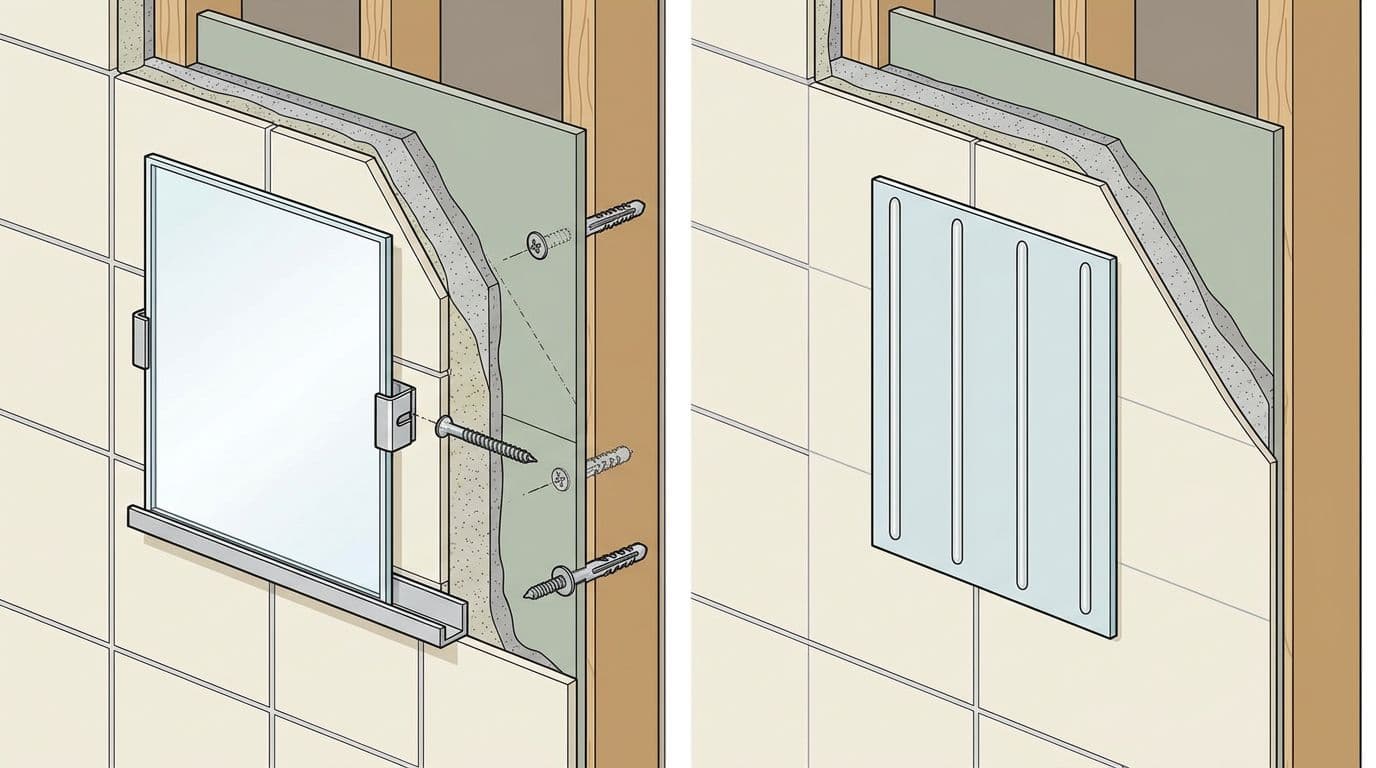
Wiring and plumbing may run behind the wall near the mirror location. Don't drill based on appearance alone. When the planned mounting area is close to an outlet, light, faucet, or plumbing fixture, have the wall and work area assessed before any drilling begins. Tile can crack when drilled incorrectly, so large or frameless mirror installation over tile is a good time to use an experienced installer.
Plan the mounting approach around the mirror
The mirror's size, weight, design, and the wall behind the tile all affect how it should be secured. A small framed mirror and a large custom panel don't pose the same installation demands. The mounting system should match the specific mirror and surface.
Avoid making last-minute changes
Confirm the final mirror dimensions, position, and orientation before installation day. Moving a mirror to avoid an outlet or tile accent can change how it aligns with the sink or lights. For a custom piece, resolve those choices before fabrication rather than trying to alter the glass after it arrives.
Large panels also need a safe route into the bathroom and a protected place to rest during installation. Clear the floor and nearby counters, and keep sharp tools or loose hardware away from the glass. Avoid lifting or repositioning a large mirror without the appropriate help.
Coordinate electrical or plumbing work separately
A mirror installer can plan around fixtures, but electrical changes and plumbing repairs need the right trade. Keep any outlet accessible, and don't cover a junction box with a permanent mirror installation. If a cutout is needed, its position should be settled before the glass is made.
Confirm fabrication details before the glass is made
Custom sizing is useful when the vanity wall has unusual dimensions, multiple sinks, or fixtures that limit mirror placement. It also gives you control over the overall outline and edge style. We offer custom mirror fabrication and glass cutting for Southwest Florida projects.
Review the measurements and features together
Before production, compare the mirror dimensions with the finished tile layout and the template. Make sure the drawing accounts for the frame or edge, planned cutouts, outlet locations, and clearances around lights and cabinets. If you're choosing between one panel and several, consider how the seams will line up with the sink centers and tile features.
Replace damaged glass instead of hiding it
An old mirror with chips, cracks, dark edge spots, or peeling backing may need replacement rather than another layer over it. Those problems can't be reversed through cleaning. A custom replacement can also account for the vanity, backsplash, lighting, outlets, and wall dimensions. For an existing damaged mirror, explore bathroom mirror repair and replacement.
Protect the mirror and finished wall
Once the mirror is installed, keep water from collecting along its lower edge. Use a soft cloth for routine cleaning and avoid letting cleaner run behind the glass. If you notice a loose edge, a new dark spot, or moisture near the mirror, have the condition assessed before it spreads.
Also keep the bathroom's ventilation in working order and maintain the grout and caulk around nearby wet areas. A leak near the backsplash or shower can affect the wall behind a mirror. If the glass becomes cracked or loose, don't try to secure it yourself; damaged glass can break during handling.
FAQ about installing a mirror over tile
Can a mirror be installed directly over bathroom tile?
Yes, but the tile and wall behind it need to be suitable for the selected mounting system. Mirror size, weight, surface condition, and nearby fixtures all affect the plan. Large or frameless mirrors call for careful measurement and secure professional installation.
How far above the backsplash should the mirror sit?
About 4 to 6 inches is a common starting point. The right gap depends on the mirror, backsplash, faucet, lighting, and people using the bathroom. Test the proposed height with a full-size outline before ordering.
Can the mirror cover an outlet?
Plan to keep outlets and electrical boxes accessible. If the mirror needs a cutout or an outlet relocation, decide that before fabrication. Have a qualified electrician handle electrical changes.
Should I drill through tile myself?
Drilling can crack tile if done incorrectly, and hidden plumbing or wiring may be nearby. For a large mirror or an uncertain wall, leave the installation to a qualified glass professional who can assess the surface and mounting needs.
Prepare first for a cleaner installation
A good result starts before the mirror reaches the wall. Measure the finished tile, map the fixtures, test the position, and settle any cutouts before fabrication. When the tile or wall conditions make installation uncertain, professional planning helps protect both the glass and your finished bathroom.