
How to Design a Shower Glass Bathroom Window
A bathroom window can bring useful daylight into a shower, but it also creates a detail that needs careful planning. Planning a shower glass bathroom window involves more than choosing clear or frosted glass. The enclosure must work with the window frame, sill, trim, privacy needs, ventilation, and waterproofing.
Many windows can remain inside a shower enclosure when they use moisture-resistant materials and have proper drainage. Others need new trim, a different operating style, or full replacement. Start with the window itself, then build the glass layout around its condition and location.
Begin With the Window's Condition and Location
The window's position affects nearly every design decision. A small window above shoulder height creates different requirements than a wide opening directly beside the shower controls. Measure the window's width, height, depth, sill height, and distance from nearby walls before selecting an enclosure style.
Look closely at the frame and surrounding materials. Vinyl, fiberglass, and aluminum frames usually handle shower moisture better than unfinished wood. However, even a moisture-resistant frame can develop problems if water collects on the sill or reaches unsealed joints. Tile, solid-surface material, or another waterproof finish should cover the areas exposed to spray.
The window should also open without striking the shower glass, showerhead, or user. Check the direction of the sash, the location of the handle, and the amount of clearance needed for cleaning. If the window provides ventilation, avoid a design that blocks access to the opening.
A window inside a shower can work well when water drains away from the frame and every exposed joint has a reliable waterproof seal.
When the existing window can remain
An existing window may stay inside the enclosure when its frame is in good condition, its trim resists moisture, and the sill slopes into the shower. The surrounding wall must also have sound waterproofing. A glass panel can sit in front of the window while leaving enough space for operation and maintenance.
A fixed panel often works well in this situation because it limits moving parts near the window. The glass can protect the opening from direct spray while preserving daylight. Your installer still needs to check the window's depth and the location of any handles before finalizing the design.
When modification or replacement makes sense
Replacement becomes more appropriate when the window has wood components, swelling, peeling paint, soft drywall, corrosion, or persistent condensation damage. A window that leaks before installation will not become reliable because a glass enclosure covers it.
Some openings need a simpler modification instead. A contractor may replace the interior trim with waterproof material, adjust the sill, move the handle, or change the window to a moisture-friendly style. Always coordinate this work with the window manufacturer, tile installer, and glass contractor. The glass should not hide a framing or waterproofing problem.
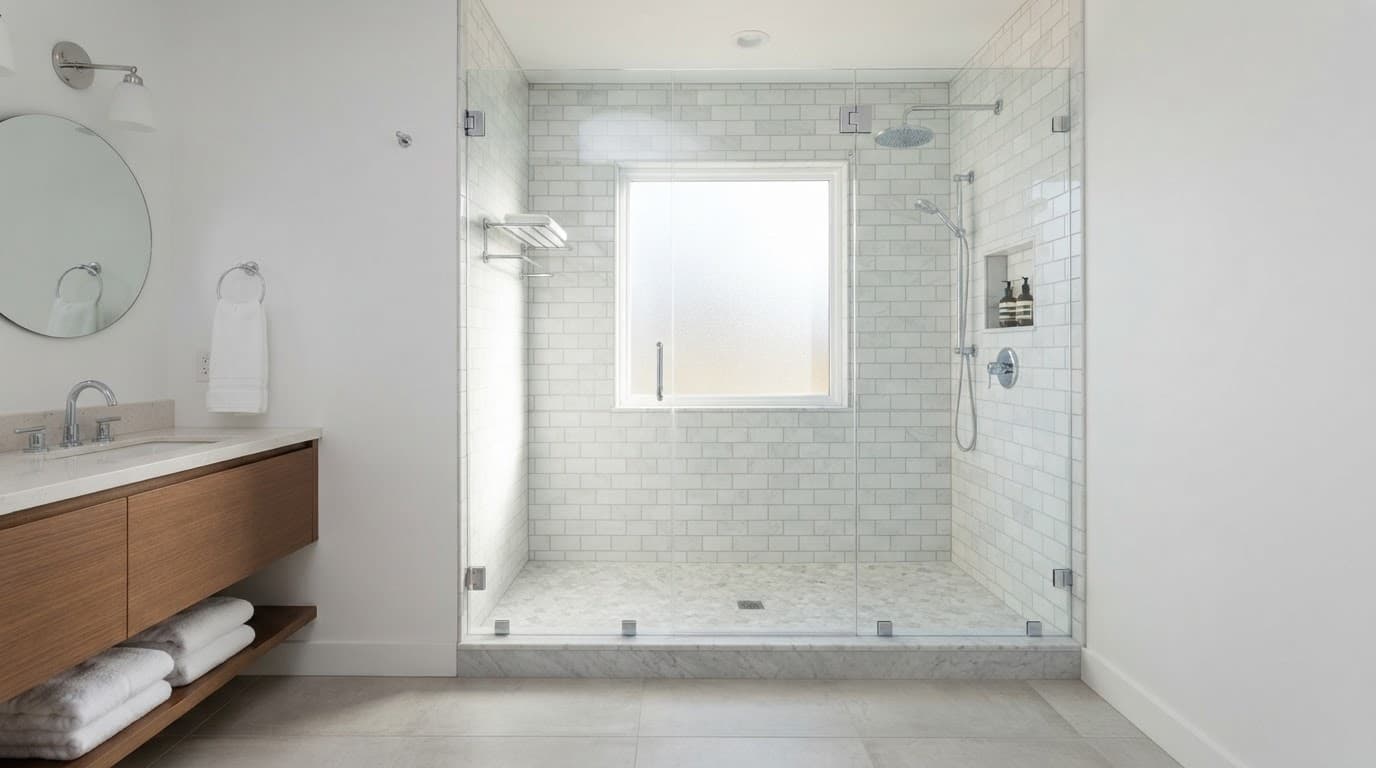
Shower Glass Bathroom Window Layouts That Fit
The best enclosure layout depends on the window's size, the shower's shape, and the available entry space. A custom design can use several glass pieces instead of forcing a standard door into an awkward opening.
Frameless glass panels for a clean view
A frameless enclosure often uses a fixed glass panel beside the window and a hinged door at the shower entrance. Minimal hardware keeps the window visible and allows more natural light into the room. This style works especially well when the opening has finished tile or stone and the walls are reasonably plumb.
The fixed panel should stop water before it reaches the window without trapping moisture between the glass and wall. Depending on the layout, the panel may align with the window edge, overlap part of the opening, or sit perpendicular to the wall. The exact position depends on spray direction and door clearance.
Clear tempered glass keeps the bathroom open and bright. If privacy matters, the window itself can use obscured glazing while the surrounding shower glass remains clear.
Fixed panels with an operable transom window
A fixed glass panel can support ventilation when an operable transom window sits above the main shower glass. This arrangement keeps the lower enclosure protected while allowing warm, humid air to escape after bathing.
An operable transom needs enough wall height and a suitable hinge or opening mechanism. The handle must remain reachable, and the window cannot interfere with the top edge of the enclosure. This design is useful when a bathroom has no exhaust fan nearby or when homeowners want natural ventilation.
The transom may use frosted or textured glass for privacy. Its frame and surrounding trim still need moisture-resistant construction, especially because warm air rises toward this area.
Partial enclosures and return panels
A partial enclosure can protect the window while leaving the shower more open. For example, a fixed panel may cover the side of the shower nearest the window, with a short return panel directing spray back toward the wet area.
This layout needs careful spray testing during design. An open entry can allow water to reach the floor, vanity, or wall outside the enclosure. The showerhead position, curb width, panel height, and window location all affect performance.
For more design ideas, review these custom shower and bath enclosures before deciding whether a full or partial layout fits your bathroom.
Choose Glass for Privacy, Light, and Maintenance
Glass selection changes the feel of the entire room. Clear glass offers the most daylight and makes a small shower appear larger. It also shows water spots more easily, especially in areas with mineral-heavy water.
Frosted or obscured glass offers privacy when the window faces a neighboring property, walkway, or another part of the home. You can use obscured glass only for the window and keep the enclosure panels clear. That combination protects privacy without making the shower feel enclosed.
Patterned glass adds texture and hides fingerprints, soap marks, and silhouettes. However, some patterns make cleaning more difficult because residue can collect in the surface texture. Ask to see a physical sample in the bathroom's lighting before choosing.
All shower enclosure glass should meet applicable safety requirements for the installation. Your glass contractor will specify the appropriate tempered glass thickness, edge treatment, hardware, and support based on the panel size and layout. Large panels require accurate support and strong attachment points, not simply thicker-looking hardware.
Hardware also deserves attention. Chrome, brushed nickel, matte black, and other finishes can coordinate with faucets and lighting. Keep hinges, clips, and channels positioned so you can wipe around them and inspect the seals.
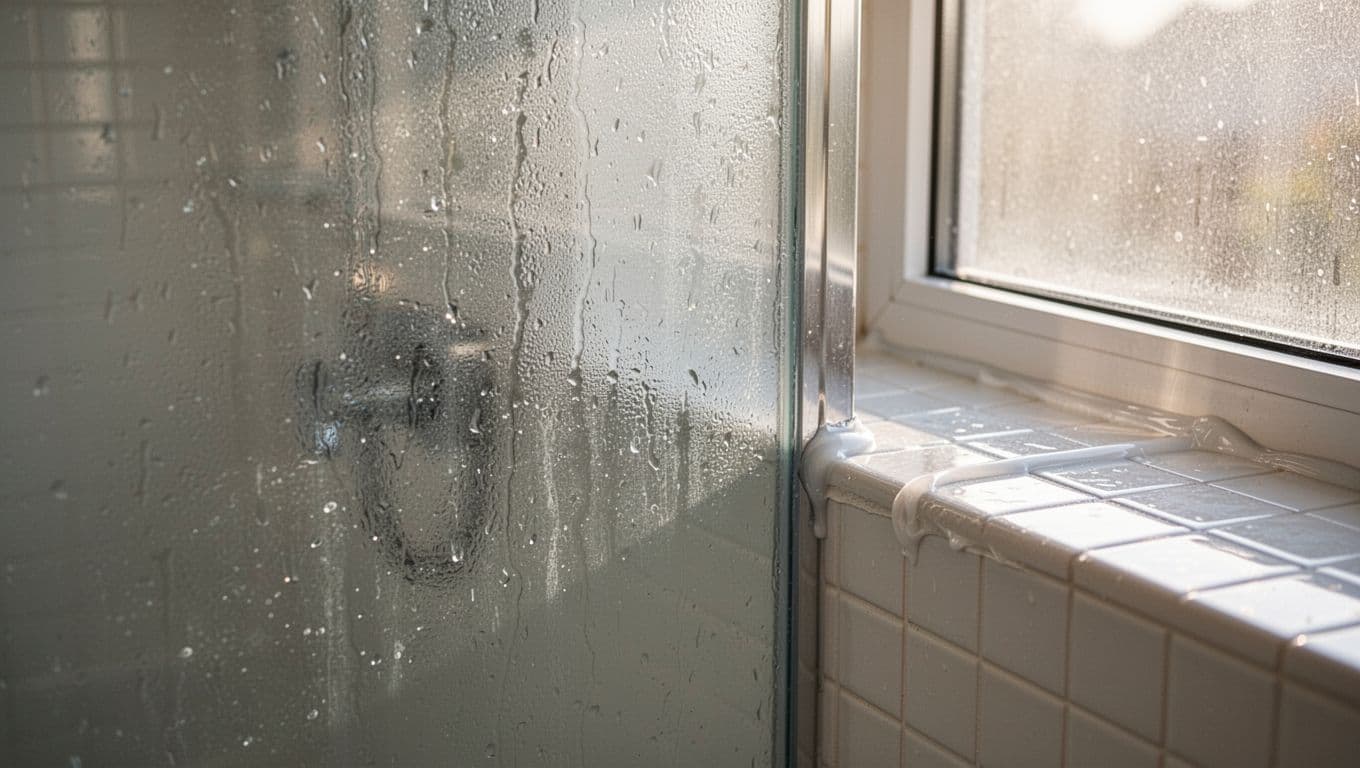
Get the Window Sill and Drainage Details Right
The sill is one of the most important parts of a shower window. It should slope slightly toward the shower so water runs into the enclosure instead of toward the wall or window frame. A flat or reverse-sloped sill can hold water against the trim every time someone showers.
Tile can create an attractive sill, but the installation needs tight joints and a durable waterproofing layer beneath it. A solid-surface sill offers fewer seams and may be easier to wipe clean. Either option should extend far enough to protect the opening and support the glass without creating a ledge that collects standing water.
The wall returns around the window also need attention. Tile or solid-surface material should wrap the sides and meet the frame with a clean, flexible seal. Avoid exposed drywall, unfinished wood, or porous trim inside the spray zone.
Glass should sit on approved setting blocks or the support system specified for the enclosure. The installer may use clips, channels, or a combination of hardware. Sealant belongs at the correct joints, but caulk should not be the only defense against water. The wall assembly, sill, tile work, and waterproofing membrane must already direct water toward the drain.
In a humid climate such as Southwest Florida, ventilation and routine maintenance matter as well. Wipe the sill after use, keep the enclosure clean, and repair failed sealant before moisture reaches the framing.
Why Custom Measurement and Professional Installation Matter
A shower glass bathroom window rarely matches the exact dimensions of a standard enclosure kit. Walls can vary slightly in width, tile can change the finished opening, and window frames are often set at different depths. Those small differences affect panel sizes, door alignment, and seal placement.
A professional field measurement should account for:
- The finished tile, stone, curb, and sill dimensions.
- Wall plumb, level, and out-of-square conditions.
- Window handles, hinges, trim, and opening clearance.
- Showerhead spray, door swing, and access to the window.
- Stud locations or approved anchors for hardware.
- The slope and height of the sill beneath the glass.
Measuring after the finished surfaces are installed usually gives the most accurate result. If the glass must be ordered earlier, the installer and builder need a clear plan for tile thickness, edge details, and final dimensions.
Installation also requires more than setting glass in place. The contractor must protect the finished surfaces, position each panel correctly, secure hardware without damaging waterproofed areas, and seal the enclosure according to the system requirements. Door gaps need consistent alignment so water stays inside while the door operates smoothly.
A professional installer can also identify conflicts before fabrication. A window may need a different hinge position, a fixed panel may need a return, or the enclosure may need a transom to preserve ventilation. Solving those issues before the glass is cut costs less than correcting them afterward.
Keep the Design Practical for Daily Use
A beautiful enclosure still needs to be easy to clean and use. Leave enough room to reach the window, wipe the sill, and inspect the seals. If the window opens inward, confirm that the sash does not collide with the glass or shower user.
Place the showerhead so its spray does not point directly at the window. A handheld sprayer can also create unwanted splash if it rests near the opening. Good panel placement reduces the amount of water that reaches the frame without making the shower feel cramped.
Privacy should match the room's actual exposure. A fully frosted enclosure may make a narrow bathroom feel darker, while a frosted window with clear surrounding panels often gives a better balance. Hardware placement should follow the door's use, not only the visual center of the glass.
Before fabrication, review a drawing or measurement plan that shows the window, panels, door swing, sill, and hardware. Ask how the installer will handle the waterproofing transition and what maintenance the seals require. Clear answers at this stage help prevent expensive changes later.
Conclusion
A shower window can remain inside a glass enclosure when the frame, trim, sill, and surrounding wall can handle repeated moisture. The design needs positive drainage, waterproof finishes, suitable glass, and enough clearance for ventilation and cleaning.
Fixed frameless panels, partial enclosures, operable transoms, and frosted window glass each solve different layout and privacy concerns. For a reliable shower glass bathroom window , accurate field measurements and professional installation matter as much as the glass style. When those details work together, the window adds daylight without becoming the weak point in the shower.