
Rain Shower Placement: Plan Glass Before You Choose
A rain shower can make a bathroom feel spacious and calm, but poor placement can send water toward the doorway every morning. The location of the shower head affects the enclosure's width, panel layout, door position, and hardware.
That decision belongs near the beginning of your remodel, not after the glass has been ordered. Before choosing an enclosure style, map the spray area, standing zone, controls, and nearby fixtures.
Key Takeaways
- Center the rain shower over the standing area, not over the entrance.
- Finalize plumbing locations before measuring glass or selecting an enclosure door.
- Account for the shower head, bench, curb, niche, controls, and towel bars together.
- Measure after waterproofing and tile work are complete.
- Naples and Southwest Florida bathrooms need good ventilation and easy-to-clean glass details.
Why Rain Shower Placement Comes Before Glass
A shower enclosure is built around the finished bathroom. Glass panels need to meet walls, curbs, benches, and floors with accurate measurements. The door also needs enough room to open without striking a vanity, toilet, towel bar, or another panel.
The rain shower location affects every one of those decisions. A ceiling-mounted head usually sends water straight downward. If you place it too close to the opening, spray can reach the bathroom floor. If you center it too far toward the back wall, the person showering may need to stand near the controls or outside the most comfortable part of the enclosure.
Wall-mounted rain shower heads create different concerns. The shower arm must extend far enough into the enclosure, and the head should angle toward the standing area. A short arm can leave the spray too close to the wall. A long arm may interfere with a door or fixed panel if the layout is tight.
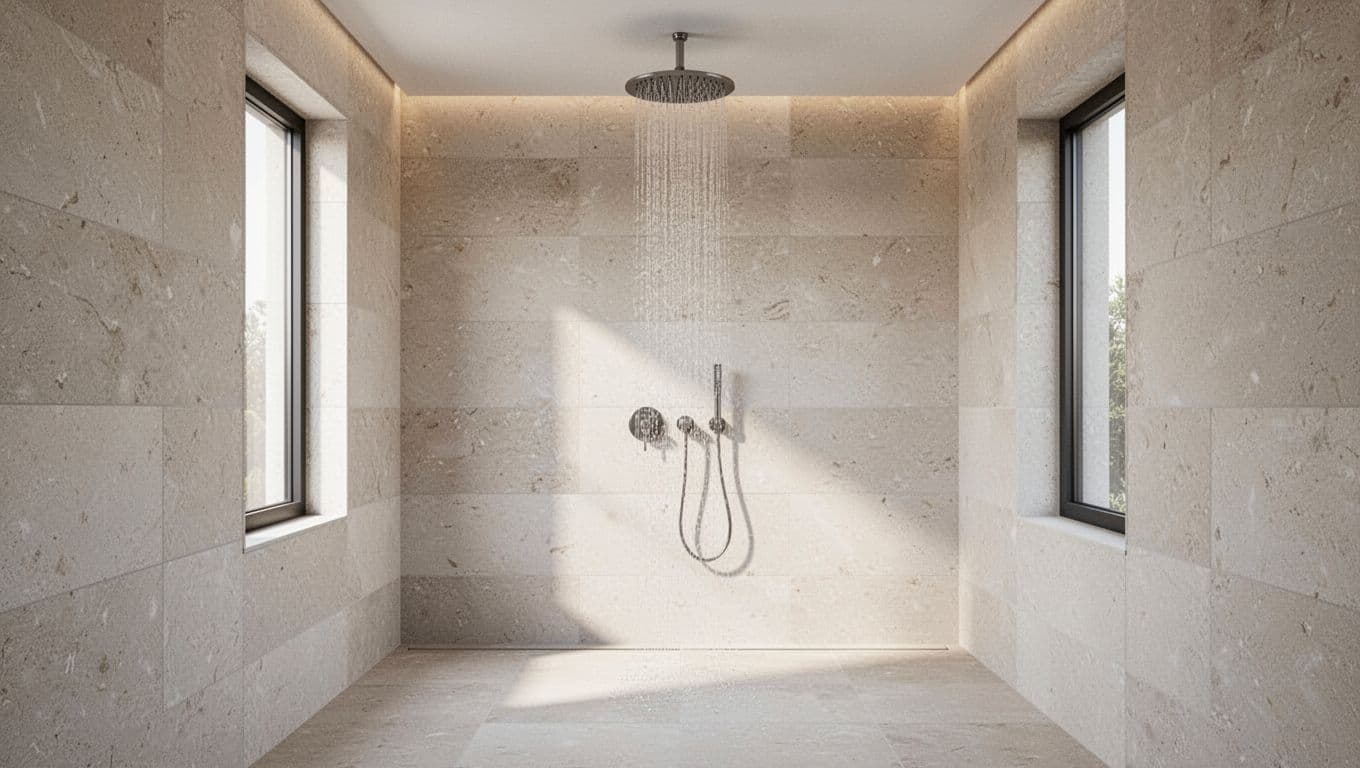
A ceiling-mounted rain shower head needs a clear position over the showering area before glass dimensions are finalized.
The controls deserve attention at the same stage. Most homeowners prefer to turn on the water without stepping directly beneath the spray. Place the valve near the entry or on a side wall, while keeping it easy to reach through the open door. A handheld shower on an adjustable bar can provide more flexibility, but it also needs wall space and a clear mounting height.
Once these locations are fixed, your glass professional can develop an enclosure that contains water without making the shower feel cramped.
Map the Spray Pattern Before Measuring the Enclosure
Start with the finished shower footprint, not the rough framing. Mark the inside edges of the curb or the planned wet-room area on the floor. Then identify the standing position, drain, bench, niche, and entry.
For a ceiling-mounted head, mark the proposed center point on the ceiling and drop that point down to the shower floor. This vertical line shows where the water will fall. The standing area should sit within the manufacturer's stated spray pattern. Head sizes vary, so check the product specifications instead of assuming that every rain shower covers the same area.
A common mistake is placing the head over a built-in bench. That may sound convenient, but it often leaves the person standing outside the strongest part of the spray. Place the head over the standing zone instead. A separate handheld fixture can serve the bench, foot washing area, or cleaning needs.
The door opening also needs a spray check. Keep the rain head far enough from the entry that water won't fall directly beside the door. A fixed glass panel beside the opening can help contain splash, but it can't compensate for a head that sits directly above the threshold.
Also mark the following before selecting glass:
- The center of the drain and any sloped floor area
- The finished curb or low-profile threshold
- The hinge side and intended door swing
- The valve, diverter, and handheld shower
- Any bench, niche, grab bar, or towel bar
- Wall framing that can support hinges or heavy hardware
Finished tile changes the available space. A shower that measures 60 inches during framing may have less interior width after backer board, waterproofing, tile, and grout are installed. Ask your installer to base the final glass measurement on completed surfaces.
Choose Enclosure Dimensions Around Real Use
The enclosure should contain the spray while leaving enough room to move, dry off, and use the fixtures comfortably. Rain shower placement helps determine whether a fixed panel, hinged door, sliding door, corner enclosure, or neo-angle design fits the room.
A fixed panel with a hinged door works well when the shower head sits toward the back of a rectangular shower. The panel can shield the opening while the door provides a practical entry. However, the hinge side needs solid support, and the door must clear nearby fixtures.
A sliding door can help in a compact Naples bathroom where a swinging door would hit the vanity or toilet. It still needs adequate wall length for the track and overlapping panels. Keep the shower head away from the door seam, because water can find its way through the meeting point between sliding panels.
Corner and neo-angle enclosures require closer coordination. The head should point toward the center of the usable shower area, while the door remains outside the main spray path. If the head is too close to one corner, the bather may stand against a wall to stay under it.
Frameless glass creates a clean appearance, but it needs accurate walls and dependable support at the hinges and clips. A semi-frameless design can provide more structure when the opening is wider or the walls aren't perfectly suited to heavy glass hardware. The enclosure style shouldn't be selected separately from the plumbing plan.
For a custom layout, consider these questions before approving dimensions:
- Can a person stand under the rain head without blocking the door?
- Does the glass extend far enough to stop water from reaching the room?
- Can the door open fully without hitting another fixture?
- Are the hinges, clamps, and support points attached to suitable framing?
- Will a future handheld shower or grab bar need space on the same wall?
The goal is a balanced wet area, not the largest possible glass opening. A slightly wider return panel may control splash better than a narrow panel that leaves the entry exposed.
Coordinate Glass Panels, Door Swing, and Hardware
Rain shower placement can affect where glass seams and hardware should go. A panel joint directly beside the shower head may receive constant spray, especially when the head is wall-mounted and angled across the enclosure. Relocating the panel seam or using a wider fixed panel can improve water control.
Door hardware also needs a clear plan. Hinges require solid attachment points, and the door's weight must be supported by the finished wall and adjacent glass configuration. Handles should sit where a person can reach them without standing beneath the spray.
Many bathroom layouts need the shower door to swing outward and clear the room. Confirm the required direction with your contractor and glass installer, along with local code requirements. Check the full door path before choosing a hinge finish or handle size.
The enclosure should also leave room for practical accessories. A towel bar mounted on the door may be convenient, but it adds weight and needs proper glass preparation. A robe hook, shelf, or grab bar can affect panel location. Plan any holes before fabrication because tempered shower glass can't be cut after it has been heat-treated.
Glass type matters as well. Shower enclosures generally use safety-tempered glass, with thickness and edge details selected for the design. Clear glass keeps sightlines open, while low-iron glass can reduce the green tint visible at the edges. Patterned or privacy glass can provide separation, although its texture may need more frequent cleaning in a humid bathroom.
A good enclosure plan considers the water path first, then places panels and hardware around it. That order prevents a beautiful door from creating an avoidable splash problem.
Account for Southwest Florida Conditions
Bathrooms in Naples, Fort Myers, Bonita Springs, and nearby communities often deal with warm, humid air. A strong exhaust fan and a reasonable run time after showers help the room dry faster. Good ventilation protects the entire bathroom, including caulk joints, painted surfaces, hardware, and mirrors.
Water spotting is another practical concern. Mineral deposits can show on clear glass, especially when droplets dry on the surface. A squeegee and regular cleaning help, while a protective glass treatment may reduce buildup. Choose hardware with finishes that fit your cleaning routine and the rest of the bathroom.
Vacation homes and seasonal properties need a layout that remains easy to inspect. Keep the shower head, valve, and door hardware accessible. A design that relies on hidden components behind finished walls can make future repairs more complicated.
Older homes around Naples may also have walls that aren't square or floors that aren't level. Custom glass can accommodate many of these conditions, but the installer needs accurate finished measurements. Avoid ordering panels based on a builder's rough dimensions.
Homeowners planning a full remodel can review custom bathroom shower enclosures after the plumbing and layout decisions are clear. The glass design should follow the completed shower plan, not force the plumbing into a position that looks good only on paper.
Schedule the Final Glass Measure at the Right Time
The most reliable sequence begins with the layout and plumbing. Next, the contractor completes framing, waterproofing, tile, and the finished curb or floor. Only then should the glass professional take final measurements.
This timing matters because small changes can affect the enclosure. Tile thickness changes the opening. A revised curb changes panel height. A moved niche can shift a hinge or handle. Measuring too early creates avoidable gaps between the plan and the finished room.
Before the measurement appointment, confirm the exact rain shower head, shower arm, valve trim, handheld system, bench, and accessories. Product dimensions can vary, even when two fixtures appear similar.
Ask for a drawing or written layout that identifies the head position, glass edges, door swing, and hardware. That record gives the plumber, tile installer, and glass contractor the same reference. It also makes changes easier to catch before fabrication begins.
A professional installer can point out problems that may not be obvious from a floor plan. For example, the proposed head location may work for spray coverage but conflict with a ceiling joist, recessed light, or access panel. Solving that issue before tile and glass are installed costs less than correcting it afterward.
Conclusion
The right rain shower placement gives the enclosure a clear job: contain water while preserving a comfortable entry and usable bathroom. Center the spray over the standing area, keep it away from the doorway, and coordinate the controls, panels, door, and hardware before fabrication.
For a Southwest Florida remodel, wait for finished tile and waterproofing before taking final measurements. When the plumbing plan comes first, your Naples shower can look open, function comfortably, and avoid costly glass changes later.